機雷がなんだ! 全速前進!

SEというかプログラマというか、日々のエンジニア生活の中で体験したことなどを中心に書き残しています。

2019年ふりかえり

今年は念願のJAWS-UGさいたま横浜)に何回か参加できた。

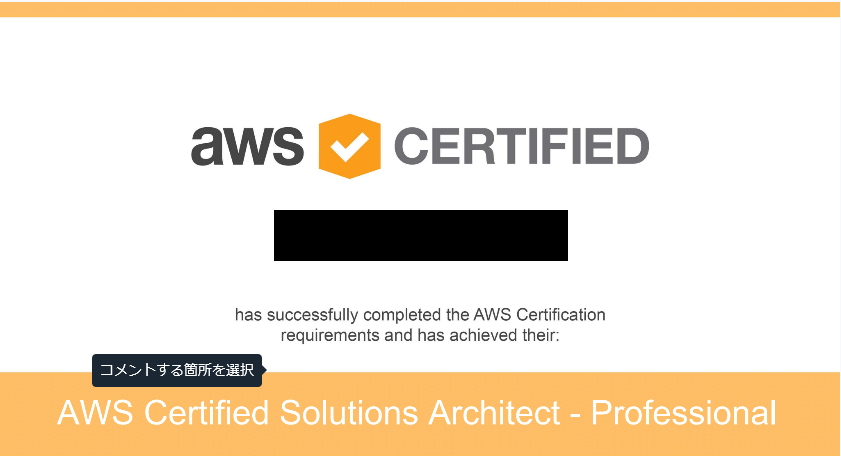
AWS Summit Tokyo 2019にも参加できたし、AWS-SAP(Solutions Architect Professional)も取得できたし、なんとAWS-re:Invent 2019シリコンバレー&ラスベガス)にも参加できた。

いろいろ問題もあったけど担当プロジェクトも何とかサービスインできた。

担当プロジェクトの追加機能開発では、顧客と一緒にスクラムで開発を進めることができてチームメンバがメキメキ成長している(※まだ仕掛中だけど)、、、

上記以外でも、Jenkins Days 2019へ参加してCloudBees川口さんと話せたし、それがキッカケでもともと興味があって触っていたJenkins Xも試せた。さらに、その流れでコンテナオーケストレーションツール(kubernetes)も触れた。


別に繋がると思ってなかったことが結果的にいろいろと繋がった年だったと思う。


今年も残すところあと6時間くらいになりましたが、来年は今年以上に繋がる年になったら良いな。そんな訳で、来年も精進します。


それでは、良いお年を

Jenkins Xを触ってみた(後編)

https://raw.githubusercontent.com/cdfoundation/artwork/master/jenkinsx/stacked/color/jenkinsx-stacked-color.png

CloudNativeなCI/CDパイプラインの本命 Jenkins X の「Serverless Jenkins X Pipelines with Tekton」を試してみました。

ちなみに前回記事はこちら(↓)

orinbou.hatenablog.com

※前回は Jenkins installation type「Static Jenkins Server and Jenkinsfiles」でした。

Using the Google Cloud Shell

今回は環境構築手順は下記の公式サイトを参考にしました。

https://github.com/jenkins-x/jx/releases/tag/v2.0.968

※よく見たらこのバージョン正式リリースじゃなくてプレスリリース版ですね。 ^^;

github.com

Google Cloud Platform(GCP)を準備

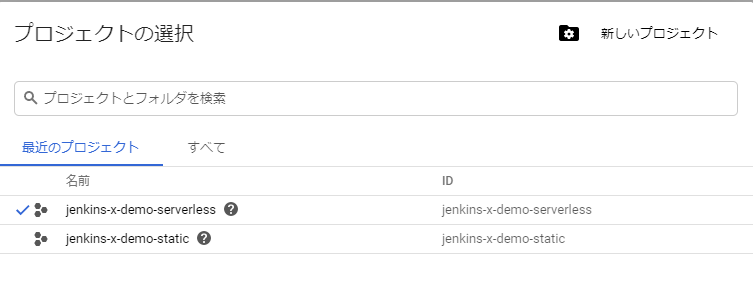
GCPダッシュボードから、新規プロジェクト(jenkins-x-demo-serverless)を作成します。
f:id:orinbou:20191109121151p:plain

プロジェクトを作成したら画面右上のCloud Shellボタンを押してWebコンソールを表示します。

f:id:orinbou:20191109121415p:plain

JenkinsXをインストールする

Google Cloud ShellのWebコンソールで下記コマンドを実行します。

$ curl -L https://github.com/jenkins-x/jx/releases/download/v2.0.968/jx-linux-amd64.tar.gz | tar xzv
$ sudo mv jx /usr/local/bin

バージョンを確認してみます。

$ jx version
NAME               VERSION
jx                 2.0.968
Kubernetes cluster v1.13.11-gke.9
kubectl            v1.13.11-dispatcher
helm client        Client: v2.14.1+g5270352
git                2.11.0
Operating System   Debian GNU/Linux 9.11 (stretch)

Google Cloud Shell は無料で利用できますが home ディレクトリ配下以外は永続化されないため注意してください(つまり本項でインストールした jx は永続化されません)

新規k8sクラスタを作成する

Google Cloud ShellのWebコンソールで下記コマンドを実行します。

$ jx create cluster gke --skip-login

Google Cloud Projectを選択します。

? Google Cloud Project:  [Use arrows to move, space to select, type to filter, ? for more help]
> jenkins-x-demo-serverless
  jenkins-x-demo-static

Google Cloud Zoneを選択します。

? Google Cloud Project: jenkins-x-demo-serverless
Updated property [core/project].
? No cluster name provided so using a generated one: mindtranslucent
? Defaulting to cluster type: Zonal
? Google Cloud Zone:  [Use arrows to move, space to select, type to filter, ? for more help]
  asia-east1-b
  asia-east1-c
  asia-east2-a
  asia-east2-b
  asia-east2-c
> asia-northeast1-a
  asia-northeast1-b
  asia-northeast1-c
  asia-northeast2-a
  asia-northeast2-b

Select Jenkins installation type(今回は【Serverless Jenkins X Pipelines with Tekton】)を選択します。(←★ココ重要!!)

? Google Cloud Project: jenkins-x-demo-serverless
Updated property [core/project].
? No cluster name provided so using a generated one: mindtranslucent
? Defaulting to cluster type: Zonal
? Google Cloud Zone: asia-northeast1-a
? Defaulting to machine type: n1-standard-2
? Defaulting to minimum number of nodes: 3
? Defaulting to maximum number of nodes: 5
? Defaulting use of preemptible VMs: No
? Defaulting access to Google Cloud Storage / Google Container Registry: Yes
? Defaulting enabling Cloud Build, Container Registry & Container Analysis API's: Yes
? Defaulting enabling Kaniko for building container images: No
Creating cluster...
WARNING: In November 2019, node auto-upgrade will be enabled by default for newly created clusters and node pools. To disable it, use the `--no-enable-autoupgrade`flag.
WARNING: Currently VPC-native is not the default mode during cluster creation. In the future, this will become the default mode and can be disabled using `--no-enable-ip-alias` flag. Use `--[no-]enable-ip-alias` flag to suppress this warning.
WARNING: Starting in 1.12, default node pools in new clusters will have their legacy Compute Engine instance metadata endpoints disabled by default. To create a cluster with legacy instance metadata endpoints disabled in the default node pool, run `clusters create` with the flag `--metadata disable-legacy-endpoints=true`.
WARNING: Your Pod address range (`--cluster-ipv4-cidr`) can accommodate at most 1008 node(s).
This will enable the autorepair feature for nodes. Please see https://cloud.google.com/kubernetes-engine/docs/node-auto-repair for more information on node autorepairs.
Creating cluster mindtranslucent in asia-northeast1-a...
...................................................................................................................................................................................................................................................................................................................................................................................................................................................................................................................................................................................................................................................................................................................................................................................................................................................................................................................................................................................................................................................................................................................................done.
Created [https://container.googleapis.com/v1/projects/jenkins-x-demo-serverless/zones/asia-northeast1-a/clusters/mindtranslucent].
To inspect the contents of your cluster, go to: https://console.cloud.google.com/kubernetes/workload_/gcloud/asia-northeast1-a/mindtranslucent?project=jenkins-x-demo-serverless
kubeconfig entry generated for mindtranslucent.
NAME             LOCATION           MASTER_VERSION  MASTER_IP     MACHINE_TYPE   NODE_VERSION   NUM_NODES  STATUS
mindtranslucent  asia-northeast1-a  1.13.11-gke.9   34.84.28.226  n1-standard-2  1.13.11-gke.9  3          RUNNING
Initialising cluster ...

? Select Jenkins installation type:  [Use arrows to move, space to select, type to filter]
> Serverless Jenkins X Pipelines with Tekton
  Static Jenkins Server and Jenkinsfiles

Domainを設定(今回は未指定。空のままEnter続行)します。

WARNING: When using tekton, only kaniko is supported as a builder
Namespace jx created
Context "gke_jenkins-x-demo-serverless_asia-northeast1-a_mindtranslucent" modified.
Setting the docker registry organisation to jenkins-x-demo-serverless in the TeamSettings
Git configured for user: orinbou and email sarubobo.com@gmail.com
Helm installed and configured
? No existing ingress controller found in the kube-system namespace, installing one: Yes
Cloning the Jenkins X versions repo https://github.com/jenkins-x/jenkins-x-versions.git with ref refs/heads/master to /home/sarubobo_com/.jx/jenkins-x-versions
? A local Jenkins X versions repository already exists, pulling the latest: Yes

Note: this loadbalancer will fail to be provisioned if you have insufficient quotas, this can happen easily on a GKE free account.
To view quotas run: gcloud compute project-info describe
Waiting for external loadbalancer to be created and update the nginx-ingress-controller service in kube-system namespace
External loadbalancer created
Waiting to find the external host name of the ingress controller Service in namespace kube-system with name jxing-nginx-ingress-controller
You can now configure a wildcard DNS pointing to the new Load Balancer address 35.243.71.113
If you don't have a wildcard DNS setup then create a DNS (A) record and point it at: 35.243.71.113, then use the DNS domain in the next input...

If you do not have a custom domain setup yet, Ingress rules will be set for magic DNS nip.io.
Once you have a custom domain ready, you can update with the command jx upgrade ingress --cluster
? Domain [? for help] (35.243.71.113.nip.io) 

GitHubユーザ名を設定します。

nginx ingress controller installed and configured
? Default enabling long term logs storage: Yes
No bucket name provided for long term storage, creating a new one
The bucket gs://mindtranslucent-lts-4f47dae0-dd2e-4bec-bb2a-ca735ac8a949 does not exist so lets create it
Set up a Git username and API token to be able to perform CI/CD
Creating a local Git user for GitHub server
? GitHub username: orinbou

GitHub連携用Tokenを設定します。 コンソールに表示されたURLをクリックしてGitHubのToken取得ページを開いてToken作成して設定します。

To be able to create a repository on GitHub we need an API Token
Please click this URL and generate a token
https://github.com/settings/tokens/new?scopes=repo,read:user,read:org,user:email,write:repo_hook,delete_repo

Then COPY the token and enter it below:

? API Token: ****************************************
Select the CI/CD pipelines Git server and user
? Do you wish to use GitHub as the pipelines Git server: Yes
Creating a pipelines Git user for GitHub server
To be able to create a repository on GitHub we need an API Token
Please click this URL and generate a token
https://github.com/settings/tokens/new?scopes=repo,read:user,read:org,user:email,write:repo_hook,delete_repo

Then COPY the token and enter it below:

? API Token: ****************************************

その後、いろいろ聞かれましたが基本Yesで設定しました。

Setting the pipelines Git server https://github.com and user name orinbou.
? A local Jenkins X versions repository already exists, pulling the latest: Yes
Enumerating objects: 1440, done.
Total 1440 (delta 0), reused 0 (delta 0), pack-reused 1440
Configuring Kaniko service account mindtranslucent-ko for project jenkins-x-demo-serverless
Unable to find service account mindtranslucent-ko, checking if we have enough permission to create
Creating service account mindtranslucent-ko
Assigning role roles/storage.admin
Assigning role roles/storage.objectAdmin
Assigning role roles/storage.objectCreator
Downloading service account key
Setting up prow config into namespace jx
Installing tekton into namespace jx
? A local Jenkins X versions repository already exists, pulling the latest: Yes

WARNING: waiting for install to be ready, if this is the first time then it will take a while to download images
Jenkins X deployments ready in namespace jx
Configuring the TeamSettings for ImportMode YAML
Creating default staging and production environments
? Select the organization where you want to create the environment repository: orinbou
Using Git provider GitHub at https://github.com
? Using Git user name: orinbou
? Using organisation: orinbou
Creating repository orinbou/environment-mindtranslucent-staging
Creating Git repository orinbou/environment-mindtranslucent-staging
Pushed Git repository to https://github.com/orinbou/environment-mindtranslucent-staging

Creating staging Environment in namespace jx
Created environment staging
Namespace jx-staging created
Creating GitHub webhook for orinbou/environment-mindtranslucent-staging for url http://hook.jx.35.243.71.113.nip.io/hook
Using Git provider GitHub at https://github.com
? Using Git user name: orinbou
? Using organisation: orinbou
Creating repository orinbou/environment-mindtranslucent-production
Creating Git repository orinbou/environment-mindtranslucent-production
Pushed Git repository to https://github.com/orinbou/environment-mindtranslucent-production

Creating production Environment in namespace jx
Created environment production
Namespace jx-production created
Creating GitHub webhook for orinbou/environment-mindtranslucent-production for url http://hook.jx.35.243.71.113.nip.io/hook

Jenkins X installation completed successfully


        ********************************************************

             NOTE: Your admin password is: XXXXXXXXXXXXXXXXXXXX

        ********************************************************


Your Kubernetes context is now set to the namespace: jx
To switch back to your original namespace use: jx namespace default
Or to use this context/namespace in just one terminal use: jx shell
For help on switching contexts see: https://jenkins-x.io/developing/kube-context/
To import existing projects into Jenkins:       jx import
To create a new Spring Boot microservice:       jx create spring -d web -d actuator
To create a new microservice from a quickstart: jx create quickstart
Fetching cluster endpoint and auth data.
kubeconfig entry generated for mindtranslucent.
Context "gke_jenkins-x-demo-serverless_asia-northeast1-a_mindtranslucent" modified.
NAME          HOSTS                                 ADDRESS         PORTS   AGE
chartmuseum   chartmuseum.jx.XXX.XXX.XXX.XXX.nip.io   XXX.XXX.XXX.XXX   80      2m57s
deck          deck.jx.XXX.XXX.XXX.XXX.nip.io          XXX.XXX.XXX.XXX   80      2m56s
hook          hook.jx.XXX.XXX.XXX.XXX.nip.io          XXX.XXX.XXX.XXX   80      2m57s
nexus         nexus.jx.XXX.XXX.XXX.XXX.nip.io         XXX.XXX.XXX.XXX   80      2m57s
tide          tide.jx.XXX.XXX.XXX.XXX.nip.io          XXX.XXX.XXX.XXX   80      2m57s

セットアップ完了したJenkinsX環境

GKEクラスタ画面でクラスタを確認できます。 f:id:orinbou:20191109124648p:plain

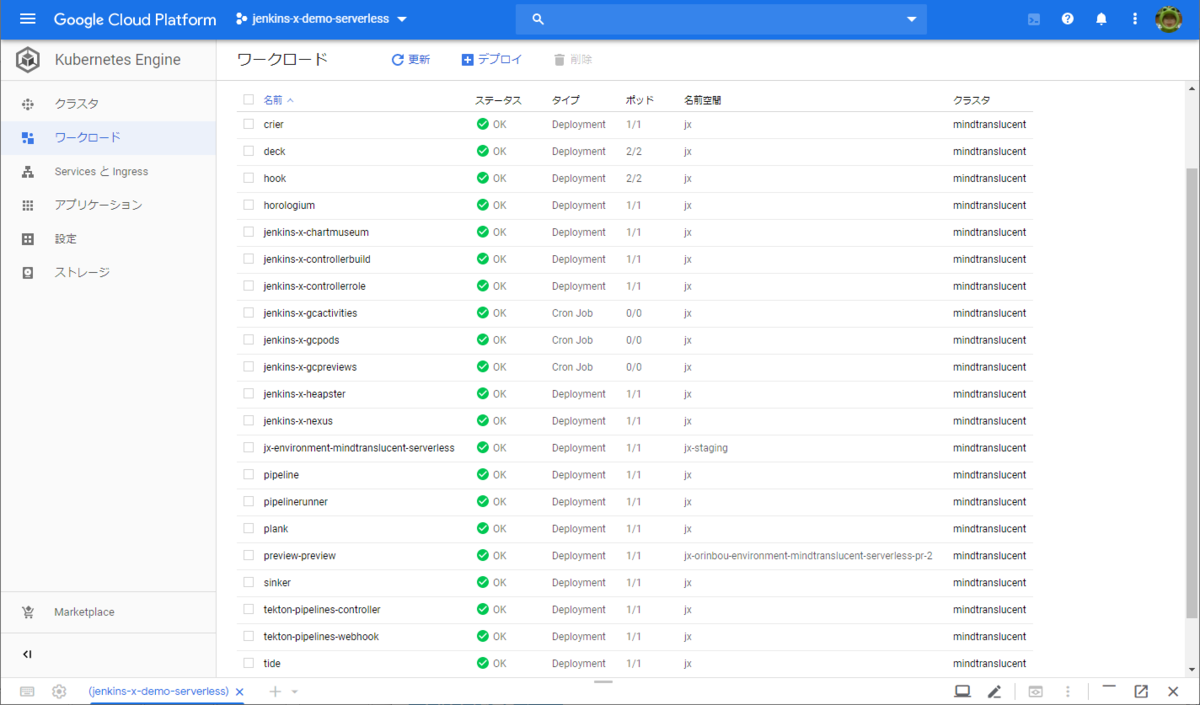
GKEワークロード画面でワークロードを確認できます。 f:id:orinbou:20191109124803p:plain

作成したクラスタは、マシンタイプ【n1-standard-2(vCPU x 2、メモリ 7.5 GB)】の3つのVMインスタンスで構成されていますね。

f:id:orinbou:20191109125247p:plain

セットアップが完了した環境へは下記のようなURLでWebブラウザからアクセスできます。

名前 URL
chartmuseum http://chartmuseum.jx.XXX.XXX.XXX.XXX.nip.io/
deck http://deck.jx.XXX.XXX.XXX.XXX.nip.io/
hook http://hook.jx.XXX.XXX.XXX.XXX.nip.io/
nexus http://nexus.jx.XXX.XXX.XXX.XXX.nip.io/
tide http://tide.jx.XXX.XXX.XXX.XXX.nip.io/

※ID/PWは、セットアップ時に表示されたもの(admin/XXXXXXXXXXXXXXXXXXXX)を使用します。

また、GitHubに新規リポジトリが作成されていることが確認できます。

新規プロジェクトを作成する(quickstart:spring boot)

Google Cloud ShellのWebコンソールで下記コマンドを実行します。
今回アプリ名(GitHubリポジトリ名)を「environment-mindtranslucent-serverless」としました。

jx create quickstart
? A local Jenkins X versions repository already exists, pulling the latest: Yes
? select the quickstart you wish to create spring-boot-http-gradle
Using Git provider GitHub at https://github.com
? Do you wish to use orinbou as the Git user name? Yes
? Who should be the owner of the repository? orinbou
? Enter the new repository name:  environment-mindtranslucent-serverless
Creating repository orinbou/environment-mindtranslucent-serverless
Generated quickstart at /home/sarubobo_com/environment-mindtranslucent-serverless
### NO charts folder /home/sarubobo_com/environment-mindtranslucent-serverless/charts/spring-boot-http-gradle
Created project at /home/sarubobo_com/environment-mindtranslucent-serverless
The directory /home/sarubobo_com/environment-mindtranslucent-serverless is not yet using git
? Would you like to initialise git now? Yes
? Commit message:  Initial import

Git repository created
selected pack: /home/sarubobo_com/.jx/draft/packs/github.com/jenkins-x-buildpacks/jenkins-x-kubernetes/packs/gradle
replacing placeholders in directory /home/sarubobo_com/environment-mindtranslucent-serverless
app name: environment-mindtranslucent-serverless, git server: github.com, org: orinbou, Docker registry org: jenkins-x-demo-serverless
skipping directory "/home/sarubobo_com/environment-mindtranslucent-serverless/.git"
Pushed Git repository to https://github.com/orinbou/environment-mindtranslucent-serverless
Creating GitHub webhook for orinbou/environment-mindtranslucent-serverless for url http://hook.jx.35.243.71.113.nip.io/hook

Watch pipeline activity via:    jx get activity -f environment-mindtranslucent-serverless -w
Browse the pipeline log via:    jx get build logs orinbou/environment-mindtranslucent-serverless/master
You can list the pipelines via: jx get pipelines
When the pipeline is complete:  jx get applications

For more help on available commands see: https://jenkins-x.io/developing/browsing/

Note that your first pipeline may take a few minutes to start while the necessary images get downloaded!

GitHubに新規リポジトリが作成されていることが確認できます。
https://github.com/orinbou/environment-mindtranslucent-serverless

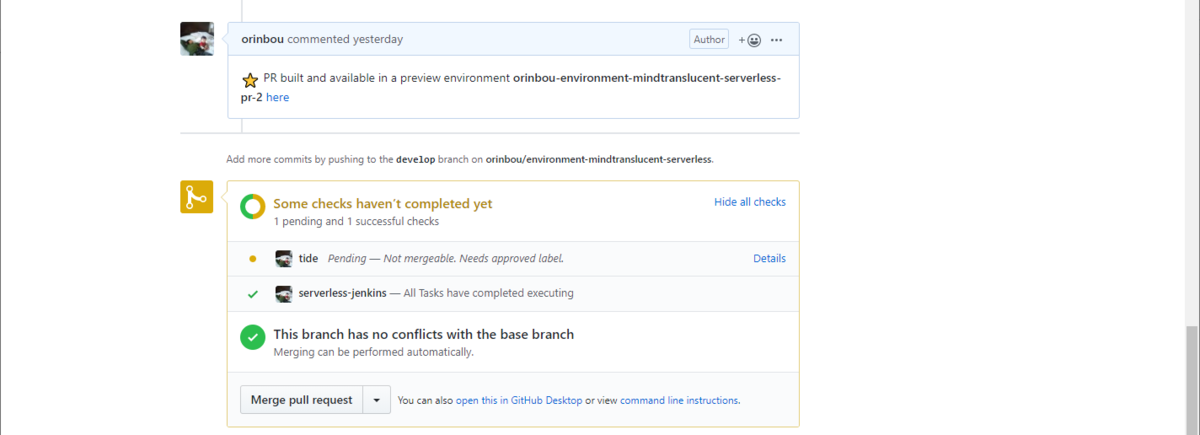
上記リポジトリをローカルPCに clone して、masterブランチへpushもしくはpull requestによるマージが発生するとWebhookイベントにより自動的にGCP環境のJenkinsでビルドされデプロイまで自動的に実行されます。自動ビルド&デプロイはデフォルトでmasterブランチに対してのアクションのみです。前回のJenkins installation type「Static Jenkins Server and Jenkinsfiles」と同様に、masterブランチへpull requestを出した際、pull requestの動作確認用のワークロード(例:jx-orinbou-environment-mindtranslucent-serverless-pr-2)が起動しているため、ソースコードのレビューと一緒に動くアプリの確認もできます。

GitHubのPull-request画面 f:id:orinbou:20191109131650p:plain
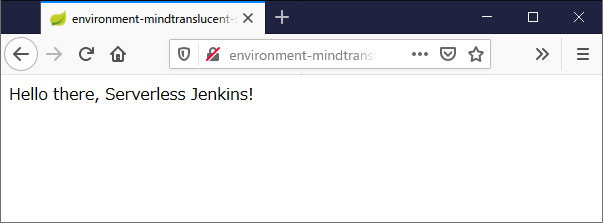
Pull-request動作確認用アプリ画面 f:id:orinbou:20191109132958p:plain

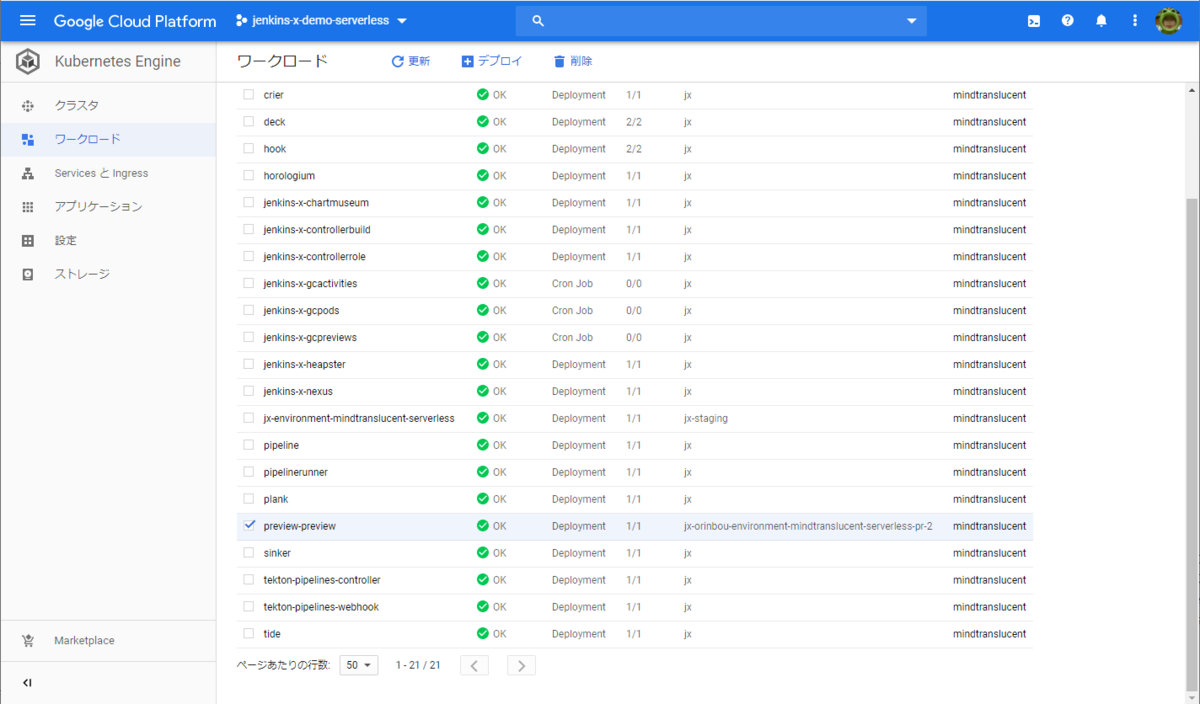
PR動作確認用アプリのワークロードの様子 f:id:orinbou:20191109131448p:plain

また、前回のJenkins installation type「Static Jenkins Server and Jenkinsfiles」では、pull requestをmasterへマージして動作確認用のGCPワークロードが不要になっても自動で削除してくれなかったのですが、今回のJenkins installation type「Serverless Jenkins X Pipelines with Tekton」では、しっかり削除までやってくれました。

ビルドの履歴はProw Status画面(deck.jx.XXX.XXX.XXX.XXX.nip.io)で確認できます。
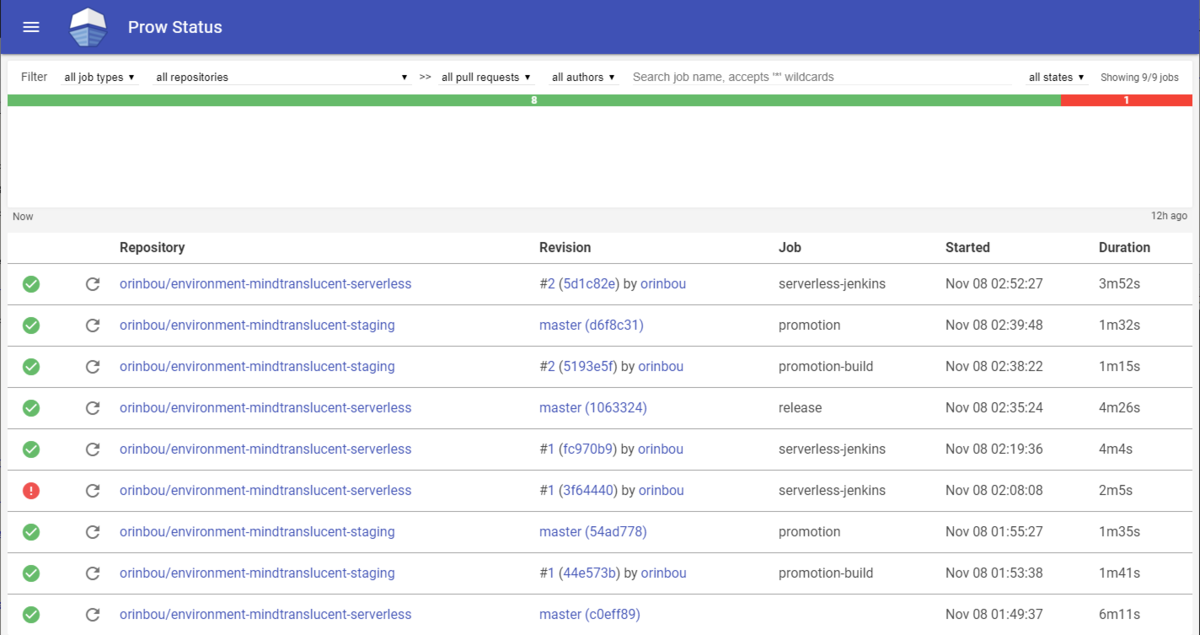
f:id:orinbou:20191109132352p:plain

さらに、下記URLで記載されているように

GitHubのPull-request画面などから、GitOpsによる操作(【例】テスト:/test、アサイン:/assign @orinbou)が可能です。

素晴らしい!イケてますね。これは本格的に使ってみたいですね。

ちなみにGitHubの画面から可能な操作の一覧は こちら です。

Jenkins X 構成要素(気になったもの)

今回試してみて気になった構成要素は下記のものになります。
また詳しく調べてみたいと思います。

Tekton Pipelines
https://tekton.dev/img/logos/tekton-horizontal-color.png

test-infra/prow at master · kubernetes/test-infra · GitHub
https://github.com/kubernetes/test-infra/raw/master/prow/logo_horizontal_solid.png

さいごに

この記事を書くのに10月に開催された Jenkins Day Japan 2019 へ参加して得られた情報とモチベーションに(あと身内からのプレッシャーにもw)助けられました。通常のJenkinsを自動車、そして、クラウドネイティブなJenkins Xを鉄道に例えて分かりやすく説明してくれた川口耕介さんをはじめイベントのスピーカーの皆様、どうもありがとうございました。

https://cloudbees.techmatrix.jp/wp-content/uploads/2019/08/JenkinsDay2019_top_br.png cloudbees.techmatrix.jp

あと、Jenkins X のイメキャラ(おじさんからロボットへ)正式に変わったんですかね?w

おまけ

今回はGCPでJenkins Xをつかってk8sクラスタ(×2:jenkins-x-demo-static、jenkins-x-demo-serverless)を約2日間動かした料金は下記のとおりでした。

f:id:orinbou:20191109143135p:plain

結構お高いので、不用意にクラスタを動かしっぱなしにしてしまわないよう十分ご注意を!!

参考

Ionic4ハンズオン資料を公開します

内部で開催したIonic4ハンズオン資料を公開します。

本ハンズオン資料では大きく下記の内容を実施します。

  • WordPressのWebAPIと連携した簡単なアプリの実装(Web+PWAアプリ)
  • Nativeアプリのビルド、配布、Native機能の連携(Nativeアプリ)

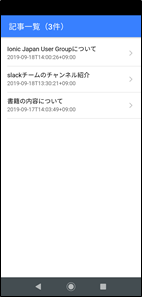
こんな感じ(↓)のサンプルアプリをサクッと作成できます。

f:id:orinbou:20190926090602p:plain f:id:orinbou:20190926090643p:plain

ハンズオン手順

ハンズオン手順は下記GithubリポジトリのREADME.mdを参照してください。 github.com

実装するアプリ

ハンズオンで実装するアプリは下記GithubリポジトリのREADME.mdを参照してください。 github.com

Webアプリ

PWAアプリ

Nativeアプリ

※補足

利用している外部サービス

本ハンズオン資料では下記のサービスを使用しています。

元ネタについて

上記のハンズオン資料は @rdlabo さんの下記の著書を参考に作成しています。
またWordPressAPIも利用させていただきました。本当に感謝です!

books.rakuten.co.jp

※もうすくIonic4 バージョンが出る(COMING SOON!)ようです。

AWS 認定ソリューションアーキテクト – プロフェッショナル(SAP)学習用セミナ動画まとめ

Youtubeに公開されているAWS公認セミナ動画でAWS 認定ソリューションアーキテクト – プロフェッショナル(SAP)の試験対策に役立ったと感じたものを個人的にまとめてみました。 知ってるとこはガンガンSkipしてOKなので、分からないところを繰り返し見て理解を深めるのが良いと思います。また、下記に掲載したセミナ動画は今現在(2019年8月16日)において比較的新しいものをチョイスしていますが、Youtubeには古いセミナ動画もけっこう沢山あるので、なるべく新しいもの(直近3年以内くらい)を見るようにしましょう。

AWS公式Youtubeページ

www.youtube.com

必見と思うもの

できれば見といた方がいいと思うもの

※上記は、個人の独断と偏見でまとめたものですのでご注意ください。

AWS 認定ソリューションアーキテクト – プロフェッショナル(SAP)を取得しました

AWS 認定ソリューションアーキテクト – プロフェッショナル を取得(1回目:6/15不合格、2回目:8/10合格)しました。

合格するまでの勉強方法などのメモです。誰かの何かの役に立てば幸いです。

AWS認定について

詳細は以下の公式ページに記載されています。

aws.amazon.com

ざっくり言うとAWS(Amazon)が公式に認定するベンダー資格です。大きくは2つのレベル(アソシエイトとプロフェッショナル)に分かれています。

また、プロフェッショナルとは別に専門知識というカテゴリも用意されており、以前は英語のみ受験が可能だったのですが、現在は全て日本語での受験が可能になっているようです。

さらに、以前プロフェッショナルのレベルと専門知識の認定試験は、アソシエイトを取得した人しか受験できませんでしたが、2018/10/11に廃止されました。詳細はこちらです。

aws.amazon.com


SAP試験対策について

試験対策については、様々なサイトやBlogでいろいろと公開されているようでググればいっぱい出てくるので、ここでは取得までに実践した内容を簡単に記載しておきます。

  • 参考書:AWS認定ソリューションアーキテクト - アソシエイト
    • 残念ながらSAPの対策本はないのでSAA用を購入しました。本に掲載されている演習問題は、SAA用のためSAP問題集としてはあまり使えませんが、AWSの基本的な知識を広く浅く把握することができるので、全体を通して何回か(※最低でも2回くらいは)読み込むと良いです。個人的には黒本の方が内容が整理されててオススメですね。本の内容は少し古いものが含まれているので最新のAWSサービスの情報を別途チェックする必要があります。

      books.rakuten.co.jpbooks.rakuten.co.jp

  • 模擬試験(※有償:¥4000 yen)
    • AWS認定の模擬試験をオンラインで受けることができます。本試験と同じような画面レイアウト(時間制限なども本番に近い)で体験できるので、一度はやっておくと良いと思います。ちなみに、AWSでは、試験問題の流出をかなり厳密に管理しているため、試験後に模擬試験の問題を見返して復習することはできませんのでご注意を!
  • AWS WEB問題集で学習しよう(※有償)
    • オリジナルのAWS認定試験対策問題集を有償で公開しています。公式の問題集がないので、こちらを利用しました。無料だとSAP向けは7問しかなくて、たぶんそれだと足りないので、有償プランの利用が現実的かな。問題の解説もあるので単に解くだけでなく、疑問に思った点を理解するのにも役立ちます。AWSホワイトペーパーへのリンクも掲載してくれていたりするので、最新の情報へも比較的シームレスにアクセスして確認できます。

      aws.koiwaclub.com

  • AWS Black Belt Online Seminar
    • Youtubeに公開されているAWS公認のセミナ動画のうちメジャーどころのサービスは一通り目を通しました。個人的にSAP試験対策には、この動画を何度も見るのが一番効果的だったと思います。通勤の往復の電車の中で何度も何度も繰り返して視聴しました。分からないところは、AWS公式のホワイトペーパーを読むのがいいと思います。(※ホワイトペーパーの全てに目を通して頭に叩き込むのは事実上不可能だと思うので、、、)

      www.youtube.com

  • Udemy(※有償:¥9600 → 1400yen)
    • 300問(75×4set)のAWS認定SAPテスト問題と説明と参考資料です。ちょうど値下げしてたので購入してみました。が、英語の長文問題を翻訳しながら模擬試験するのが辛くて、購入したけど殆ど利用しませんでした。英語に抵抗がない人には良いかも。

      AWS Certified Solutions Architect Professional Practice Exam

  • その他
    • 地味に大事なのが受験会場ですね。受験会場によってだいぶ当日のストレスや疲労に差が出ると思います。個人的には歌舞伎座テストセンターをオススメします。また、受験会場以外だと、今年に入って認定ポリシーが変更(2019/2)になり、合格基準も変わっていたり(スコア範囲:100~1000でスコア750以上)していて、情報がまだ少ないので、最近受験した人に話を聞いてみると良いと思います。


今回のSAP受験は1回目、2回目ともに歌舞伎座テストセンターを選択したので、以前SAAを受験したときのような無駄なストレスや監視に煩わされることはありませんでした。SAAの時と違い、1回目、2回目ともに試験時間は結構キツキツでタイムマネジメントが重要になります。最後の「試験を終了する」ボタンをクリックする時のあの気持は相変わらずなんとも言えない感じ。今回、スコアは783でなんとかSAP試験に合格できました。 f:id:orinbou:20190812150755p:plain

お疲れさまでした。


AWSのDRシナリオが変わっていた件

DR(Disaster Recovery)のシナリオが少し変わっていたのでメモがてら更新

AWSのDR資料でコールドスタンバイがパイロットライトに変わっていました。

www.slideshare.net

【↓】変更点(コールドスタンバイ→パイロットライト)

  • AWS Black Belt Online Seminar AWSで実現するDisaster Recovery(2017年)

www.slideshare.net

両シナリオを考慮した番付けは下記のような感じでしょうか。

【可用性:高↑】

  • マルチサイト
  • ウォームスタンバイ
  • パイロットライト ←推奨(F/O時間:短)
  • コールドスタンバイ ←非推奨?(F/O時間:長)
  • バックアップ&リストア

【可用性:低↓】

コストの差が気になるところではありますが、クラウドサービスを有効活用することを考えると、今更コールドスタンバイを選択する理由がないってことなんでしょうね。

ちなみにAzureのDR資料でも分けて記載されていました。

Jenkins Xを触ってみた(前編)

少し時間が空いてしまいましたが、下記セミナーに参加してきてきました。

https://cloudbees.techmatrix.jp/wp-content/uploads/2019/05/jenkinsx_br2_20180628.png cloudbees.techmatrix.jp

せっかくなので、少し手を動かして Jenkins X を触ってみました。

Using the Google Cloud Shell

環境構築手順は下記の公式サイトを参考にしました。
https://jenkins-x.io/getting-started/create-cluster/#using-the-google-cloud-shell

Google Cloud Platform(GCP)を準備

まずはJenkinsXを動かすためGoogleクラウド環境を使えるようにします。
https://cloud.google.com/free/
GCP無料枠で12か月$300の無料クレジットで、あらゆるGCPプロダクトを試用することができます。

Google Cloud Shellへ接続する

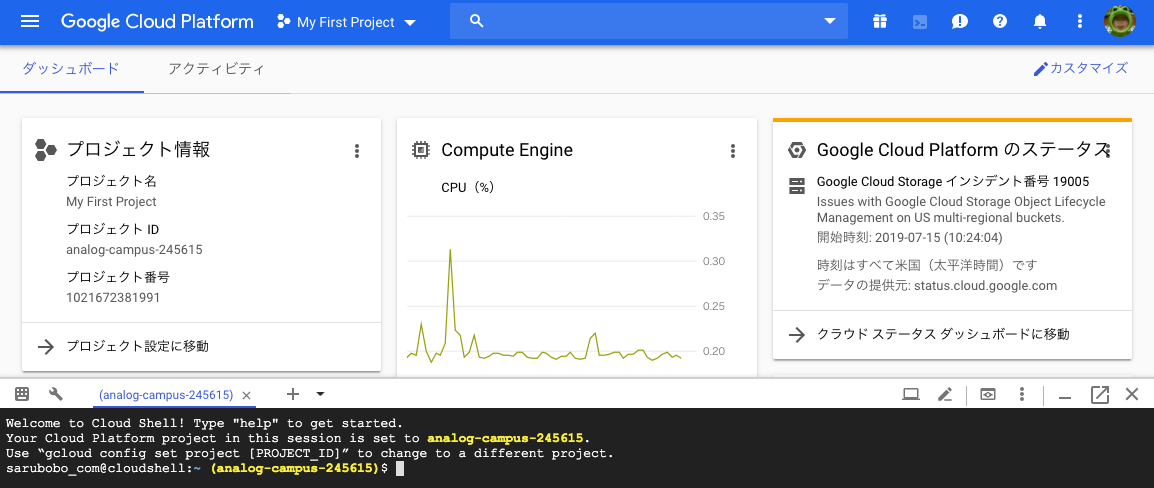
GCPダッシュボードを表示し、初期表示プロジェクト(My First Project)画面右上のCloud Shellボタンを押してWebコンソールを表示します。

f:id:orinbou:20190716035315p:plain

あと、GKEでよく使うのは下記の画面ですね。

JenkinsXをインストールする

Google Cloud ShellのWebコンソールで下記コマンドを実行します。

gcp_user@cloudshell:~ (analog-campus-245615)$ curl -L https://github.com/jenkins-x/jx/releases/download/v2.0.413/jx-linux-amd64.tar.gz | tar xzv
  % Total    % Received % Xferd  Average Speed   Time    Time     Time  Current
                                 Dload  Upload   Total   Spent    Left  Speed
100   612    0   612    0     0    717      0 --:--:-- --:--:-- --:--:--   717
  0     0    0     0    0     0      0      0 --:--:--  0:00:01 --:--:--     0LICENSE
README.md
changelog.md
jx
100 63.5M  100 63.5M    0     0  7725k      0  0:00:08  0:00:08 --:--:-- 11.5M

gcp_user@cloudshell:~ (analog-campus-245615)$ sudo mv jx /usr/local/bin

Google Cloud Shell は無料で利用できますが home ディレクトリ配下以外は永続化されないため注意してください(つまり本項でインストールした jx は永続化されません)

新規k8sクラスタを作成する

Google Cloud ShellのWebコンソールで下記コマンドを実行します。

gcp_user@cloudshell:~ (analog-campus-245615)$ jx create cluster gke --skip-login
Using the only Google Cloud Project analog-campus-245615 to create the cluster
Updated property [core/project].
? No cluster name provided so using a generated one: armmotley
? Defaulting to cluster type: Zonal
? Google Cloud Zone: asia-northeast1-a
? Defaulting to machine type: n1-standard-2
? Defaulting to minimum number of nodes: 3
? Defaulting to maxiumum number of nodes: 5
? Defaulting use of preemptible VMs: No
? Defaulting access to Google Cloud Storage / Google Container Registry: Yes
? Defaulting enabling Cloud Build, Container Registry & Container Analysis API's: Yes
? Defaulting enabling Kaniko for building container images: No
Creating cluster...
WARNING: In June 2019, node auto-upgrade will be enabled by default for newly created clusters and node pools. To disable it, use the `--no-enable-autoupgrade` flag.
WARNING: Starting in 1.12, new clusters will have basic authentication disabled by default. Basic authentication can be enabled (or disabled) manually using the `--[no-]enable-basic-auth` flag.
WARNING: Starting in 1.12, new clusters will not have a client certificate issued. You can manually enable (or disable) the issuance of the client certificate using the `--[no-]issue-client-certificate` flag.
WARNING: Starting in 1.12, default node pools in new clusters will have their legacy Compute Engine instance metadata endpoints disabled by default. To create a cluster with legacy instance metadata endpoints disabled in the default node pool, run `clusters create` with the flag `--metadata disable-legacy-endpoints=true`.
WARNING: The Pod address range limits the maximum size of the cluster. Please refer to https://cloud.google.com/kubernetes-engine/docs/how-to/flexible-pod-cidr to learn how to optimize IP address allocation.
This will enable the autorepair feature for nodes. Please see https://cloud.google.com/kubernetes-engine/docs/node-auto-repair for more information on node autorepairs.
Creating cluster armmotley in asia-northeast1-a...
..................................................................................................................................................................................................................................................................................................................................................................................................................................................................................................................................................................................................................................................................................................................................................................................................................................................................................................................................................................................................................................................................................................................................................................................done.
Created [https://container.googleapis.com/v1/projects/analog-campus-245615/zones/asia-northeast1-a/clusters/armmotley].
To inspect the contents of your cluster, go to: https://console.cloud.google.com/kubernetes/workload_/gcloud/asia-northeast1-a/armmotley?project=analog-campus-245615
kubeconfig entry generated for armmotley.
NAME       LOCATION           MASTER_VERSION  MASTER_IP       MACHINE_TYPE   NODE_VERSION   NUM_NODES  STATUS
armmotley  asia-northeast1-a  1.12.8-gke.10   35.190.231.169  n1-standard-2  1.12.8-gke.10  3          RUNNING
Initialising cluster ...
? Select Jenkins installation type: Static Jenkins Server and Jenkinsfiles
Namespace jx created
Context "gke_analog-campus-245615_asia-northeast1-a_armmotley" modified.
Setting the docker registry organisation to analog-campus-245615 in the TeamSettings
Git configured for user: orinbou and email sarubobo.com@gmail.com
helm installed and configured
? No existing ingress controller found in the kube-system namespace, installing one: Yes
WARNING: failed to create system vault in namespace jx due to no "jx-vault-armmotley" vault found in namespace "jx"

Note: this loadbalancer will fail to be provisioned if you have insufficient quotas, this can happen easily on a GKE free account.
To view quotas run: gcloud compute project-info describe
Waiting for external loadbalancer to be created and update the nginx-ingress-controller service in kube-system namespace
External loadbalancer created

Waiting to find the external host name of the ingress controller Service in namespace kube-system with name jxing-nginx-ingress-controller
You can now configure a wildcard DNS pointing to the new Load Balancer address XXX.XXX.XXX.XXX
If you don't have a wildcard DNS setup then create a DNS (A) record and point it at: XXX.XXX.XXX.XXX, then use the DNS domain in the next input...

If you do not have a custom domain setup yet, Ingress rules will be set for magic DNS nip.io.
Once you have a custom domain ready, you can update with the command jx upgrade ingress --cluster
? Domain XXX.XXX.XXX.XXX.nip.io
nginx ingress controller installed and configured
? Default enabling long term logs storage: Yes
No bucket name provided for long term storage, creating a new one
The bucket gs://armmotley-lts-b31446e8-4216-4864-afc5-2d295030f503 does not exist so lets create it

Set up a Git username and API token to be able to perform CI/CD
? Do you wish to use orinbou as the local Git user for GitHub server: Yes
Select the CI/CD pipelines Git server and user
? Do you wish to use GitHub as the pipelines Git server: Yes
Setting the pipelines Git server https://github.com and user name orinbou.
Cloning the Jenkins X cloud environments repo to /home/sarubobo_com/.jx/cloud-environments
? A local Jenkins X cloud environments repository already exists, recreating with latest: Yes
Cloning the Jenkins X cloud environments repo to /home/sarubobo_com/.jx/cloud-environments
Enumerating objects: 1436, done.
Total 1436 (delta 0), reused 0 (delta 0), pack-reused 1436
? Defaulting workload build pack: Kubernetes Workloads: Automated CI+CD with GitOps Promotion
Setting the team build pack to kubernetes-workloads repo: https://github.com/jenkins-x-buildpacks/jenkins-x-kubernetes.git ref: master
Installing jx into namespace jx
Installing jenkins-x-platform version: 2.0.822

WARNING: waiting for install to be ready, if this is the first time then it will take a while to download images
Jenkins X deployments ready in namespace jx
Configuring the TeamSettings for ImportMode Jenkinsfile
Configure Jenkins API Token
Generating the API token...
Logged in admin to Jenkins server at http://jenkins.jx.XXX.XXX.XXX.XXX.nip.io via legacy security realm
Enable CSRF protection at: http://jenkins.jx.XXX.XXX.XXX.XXX.nip.io/configureSecurity/
Created user admin API Token for Jenkins server jenkins.jx.XXX.XXX.XXX.XXX.nip.io at http://jenkins.jx.XXX.XXX.XXX.XXX.nip.io
Updating Jenkins with new external URL details http://jenkins.jx.XXX.XXX.XXX.XXX.nip.io
Creating default staging and production environments
? Select the organization where you want to create the environment repository: orinbou
Using Git provider GitHub at https://github.com
Creating repository orinbou/environment-armmotley-staging
Creating Git repository orinbou/environment-armmotley-staging
Pushed Git repository to https://github.com/orinbou/environment-armmotley-staging

Creating staging Environment in namespace jx
Created environment staging
Namespace jx-staging created
Created Jenkins Project: http://jenkins.jx.XXX.XXX.XXX.XXX.nip.io/job/orinbou/job/environment-armmotley-staging/

Note that your first pipeline may take a few minutes to start while the necessary images get downloaded!

Creating GitHub webhook for orinbou/environment-armmotley-staging for url http://jenkins.jx.XXX.XXX.XXX.XXX.nip.io/github-webhook/
Using Git provider GitHub at https://github.com
Creating repository orinbou/environment-armmotley-production
Creating Git repository orinbou/environment-armmotley-production
Pushed Git repository to https://github.com/orinbou/environment-armmotley-production

Creating production Environment in namespace jx
Created environment production
Namespace jx-production created
Created Jenkins Project: http://jenkins.jx.XXX.XXX.XXX.XXX.nip.io/job/orinbou/job/environment-armmotley-production/

Note that your first pipeline may take a few minutes to start while the necessary images get downloaded!

Creating GitHub webhook for orinbou/environment-armmotley-production for url http://jenkins.jx.XXX.XXX.XXX.XXX.nip.io/github-webhook/

Jenkins X installation completed successfully


        ********************************************************

             NOTE: Your admin password is: XXXXXXXXXXXXXXXXXXXX

        ********************************************************


Your Kubernetes context is now set to the namespace: jx
To switch back to your original namespace use: jx namespace default
Or to use this context/namespace in just one terminal use: jx shell
For help on switching contexts see: https://jenkins-x.io/developing/kube-context/
To import existing projects into Jenkins:       jx import
To create a new Spring Boot microservice:       jx create spring -d web -d actuator
To create a new microservice from a quickstart: jx create quickstart
Fetching cluster endpoint and auth data.
kubeconfig entry generated for armmotley.
Context "gke_analog-campus-245615_asia-northeast1-a_armmotley" modified.
NAME              HOSTS                                      ADDRESS          PORTS   AGE
chartmuseum       chartmuseum.jx.XXX.XXX.XXX.XXX.nip.io       XXX.XXX.XXX.XXX   80      3m13s
docker-registry   docker-registry.jx.XXX.XXX.XXX.XXX.nip.io   XXX.XXX.XXX.XXX   80      3m13s
jenkins           jenkins.jx.XXX.XXX.XXX.XXX.nip.io           XXX.XXX.XXX.XXX   80      3m13s
nexus             nexus.jx.XXX.XXX.XXX.XXX.nip.io             XXX.XXX.XXX.XXX   80      3m13s

セットアップ完了したJenkinsX環境

GCPKubernetes クラスタ画面でクラスタを確認できます。

f:id:orinbou:20190716035715p:plain

セットアップが完了した環境へは下記のようなURLでWebブラウザからアクセスできます。

名前 URL
chartmuseum http://chartmuseum.jx.XXX.XXX.XXX.XXX.nip.io/
docker-registry http://docker-registry.jx.XXX.XXX.XXX.XXX.nip.io/
jenkins http://jenkins.jx.XXX.XXX.XXX.XXX.nip.io/
nexus http://nexus.jx.XXX.XXX.XXX.XXX.nip.io/

※ID/PWは、セットアップ時に表示されたもの(admin/XXXXXXXXXXXXXXXXXXXX)を使用します。

また、GitHubに新規リポジトリが作成されていることが確認できます。

新規プロジェクトを作成する(quickstart:spring boot)

Google Cloud ShellのWebコンソールで下記コマンドを実行します。

gcp_user@cloudshell:~ (analog-campus-245615)$ jx create quickstart
Using Git provider GitHub at https://github.com
? Do you wish to use orinbou as the Git user name? Yes
? Which organisation do you want to use? orinbou
? Enter the new repository name:  jx-create-quickstart-sample
Creating repository orinbou/jx-create-quickstart-sample
? select the quickstart you wish to create spring-boot-http-gradle
Generated quickstart at /home/sarubobo_com/jx-create-quickstart-sample
### NO charts folder /home/sarubobo_com/jx-create-quickstart-sample/charts/spring-boot-http-gradle
Created project at /home/sarubobo_com/jx-create-quickstart-sample
The directory /home/sarubobo_com/jx-create-quickstart-sample is not yet using git
? Would you like to initialise git now? Yes
? Commit message:  Initial import

Git repository created
selected pack: /home/sarubobo_com/.jx/draft/packs/github.com/jenkins-x-buildpacks/jenkins-x-kubernetes/packs/gradle
replacing placeholders in directory /home/sarubobo_com/jx-create-quickstart-sample
app name: jx-create-quickstart-sample, git server: github.com, org: orinbou, Docker registry org: analog-campus-245615
skipping directory "/home/sarubobo_com/jx-create-quickstart-sample/.git"
Pushed Git repository to https://github.com/orinbou/jx-create-quickstart-sample
Created Jenkins Project: http://jenkins.jx.XXX.XXX.XXX.XXX.nip.io/job/orinbou/job/jx-create-quickstart-sample/

Watch pipeline activity via:    jx get activity -f jx-create-quickstart-sample -w
Browse the pipeline log via:    jx get build logs orinbou/jx-create-quickstart-sample/master
You can list the pipelines via: jx get pipelines
When the pipeline is complete:  jx get applications

For more help on available commands see: https://jenkins-x.io/developing/browsing/

Note that your first pipeline may take a few minutes to start while the necessary images get downloaded!

Creating GitHub webhook for orinbou/jx-create-quickstart-sample for url http://jenkins.jx.XXX.XXX.XXX.XXX.nip.io/github-webhook/

GitHubに新規リポジトリが作成されていることが確認できます。
https://github.com/orinbou/jx-create-quickstart-sample

あとは、上記リポジトリをローカルPCに clone して、masterブランチへpushもしくはpull requestによるマージが発生するとWebhookイベントにより自動的にGCP環境のJenkinsでビルドされデプロイまで自動的に実行されます。自動ビルド&デプロイはデフォルトでmasterブランチに対してのアクションのみです。驚いたのは、masterブランチへpull requestを出した際、pull requestの動作確認用のワークロード(例:jx-orinbou-jx-create-quickstart-sample-pr-1)が起動してすぐに動作確認できるようになっていた点です。とても便利です。

ちょっと残念だったのがpull requestをmasterへマージして動作確認用のGCPワークロードが不要になっても自動で削除してくれないところですね。GCP画面からいちいち選択して削除するのはダサいし、ヘビーに使う場合は管理が煩雑になりそう。不要ワークロードへの課金も心配です。

今回はJenkins installation typeを「Static Jenkins Server and Jenkinsfiles」にしましたが、次は「Serverless Jenkins X Pipelines with Tekton」にして試してみたいと思います。 下記URLに記載されている情報によると、Serverless Jenkins X Pipelines の方は、GitHub画面でBotと対話しながらより便利にGitOpsオペレーションができるっぽいので楽しみです。

上記URLのプロモーションを見ると、今回残念に感じた不要ワークロードの削除なんかもGitHubの画面からBotにやってもらえそう。

https://jenkins.io/images/jenkins-x-logo.png

参考